1. Document Information

1.1. Abstract

This document explains the details of MAVID-3M Evaluation Kit (EVK) Setup, Firmware Upgrade procedures, network setup, and APP usage and GPIOs customization in MAVID-3M platform.

Libre Wireless, MAVID-3M is an ultra-low power device targeted for voice/AI, audio streaming and multi-protocol connectivity IoT hub and device applications.

1.2. Document Convention

Icon Meaning Description
Note Provides information good to know
Caution Indicates situation that might result in loss of data or hardware damage

2. MAVID-3M Architecture

2.1. System Architecture

MAVID-3M system architecture is represented as shown in the below diagram:

Figure 2.1-1: MAVID-3M Block Diagram

MAVID-3M has in-built:

  • ARM Cortex M4 196 MHz
  • Open SDK Voice/AI, IoT and Audio on Free RTOS Operating System
  • 1x UART (currently used for debugging)
  • 2x SPI (QSPI for Flash, SPI for Voice Front End)
  • 1x I2C
  • 1x I2S Serial audio interface
  • 1x Analog port (12 bits ADC)
  • Hi Resolution Audio (up to 192 kHz/24 bits) stereo supported
  • LPCM, MP3, HE AAC decode capability
  • Crypto Engine for AES 128, 192, 256. DES, 3DES, MD5, SHA 1, 224, 256, 384, 512, True Random number generator
  • Two/three MIC Far Field voice. Noise reduction (Beam Forming) and AEC
  • Internal 0.4MB/4.4MB SRAM
  • External QSPI flash 4MB (XIP)
  • 1x1, 802.11 b/g/n 2.4GHz WLAN
  • BLE 5.0
  • Wi-Fi/BLE coexistence
  • Supports 20MHz, 40MHz bandwidth in 2.4 GHz band>
  • Wi-Fi security WEP, WPA2 and WPS
  • Dedicated high-performance 32-bit RISC CPU up to 160 MHz clock to run WLAN firmware
  • Android and iOS Application for device on boarding and other functionalities
  • Secure OTA Firmware Update
  • Complete Low Power AVS “MIC to Cloud” Solution (Amazon AVS)
  • IoT Stack for AWS or custom IoT Application, Device cloud for back end support

2.2. Software Architecture

MAVID-3M Software architecture is very flexible for the customer. Button and LED behavior can be easily configured by customer. With the help of Libre’s MAVID-3M SDK, customer can write the IoT application to customize the sensor data, actions to be taken for actuators and communication with cloud. Libre also provides the ENV software to store the device configuration, login details in non-volatile memory. Customer can easily write and read the contents of ENV. MAVID-3M also supports the secure firmware update over the air.

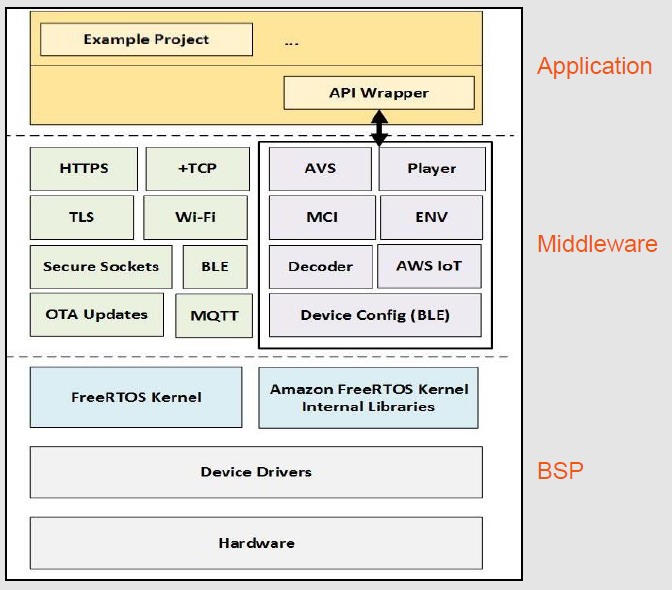
Figure 2.2-2: Block diagram for Libre MAVID-3M SDK

2.3. Security

MAVID-3M software also takes care of security at each stage of device operation.

  • Secure Boot: MAVID-3M supports secure boot, where the BootROM code checks the authenticity and integrity of the application code before starting.
  • Secure Firmware Update: MAVID-3M supports secure firmware update over air. The application binary is encrypted and uploaded to OTA cloud server. MAVID-3M starts updating the firmware when new version is found. Authenticity and integrity are checked before flashing new firmware to device.

2.4. UART debugging

Libre does run command line interpreter (CLI) over UART, it includes the following capabilities:

  • Does have the boot up logs with appropriate initialization state of each module, that point out the errors or exception with details.
  • Relevant runtime debugging information for every module, this will be looked up on to trace bugs
  • The Command Interpreter over UART provides custom AT commands such as
    • Memory analysis - To monitor system memory
    • CPU utilization - To monitor CPU load
    • Modify Config parameters - To change the configuration parameters (NV-items) to change mode

3. MAVID-3M EVK Setup

MAVID-3M comes with an extensive software SDK features for Voice/AI, Audio and Multi-protocol IoT control applications. Custom applications can be developed using the SDK.

3.1. MAVID-3M EVK

EVK is a MAVID-3M device-based reference design, used for customer evaluation purpose:

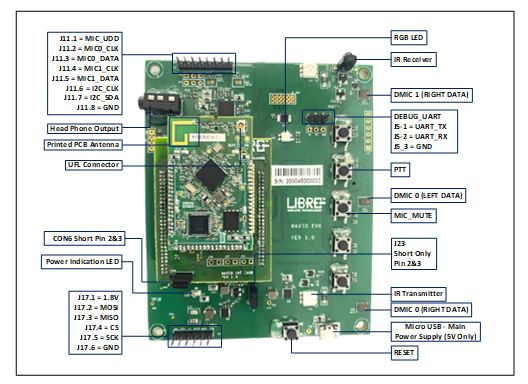
Figure 3.1-1: MAVID-3M EVK

3.2. EVK Product UI

The MAVID-3M EVK board has the following switches and defined functionality as given below:

Switch# Short press Functionality Long press Functionality MAVID_3M
SW3 PTT SETUP PORTB_FS
SW4 MUTE Power OFF/Reboot PORTB_CLK
SW5 Vol+ NA PORTB_DI
SW6 Vol- NA PORTB_DO
SW7 Play/Pause NA NA
  • Apart from these buttons, there is a button SW9 known as RESET button. It will reset the board
  • MAVID-3M EVK supports 3 digital MICs or 2 analog MICs
  • For audio output Jack is provided, which can be listened through speakers with in-built amplifier or earphone
  • New introductions in MAVID-3M are IR transmitter and IR receiver
  • UART at J5 are used to program firmware and debug purpose

3.3. LED Indication Status

The MAVID-3M EVK board has the following System LEDs along with AVS LEDs as mentioned below:

3.3.1. System LED

State LED Indication
LED Indication LED Indication
Listening Cyan
Thinking Cyan and Blue - Alternating
Speaking Cyan and Blue - Pulsing
Notification Arrives Yellow - Burst
Notification Queued Yellow - Slow Pulse
Microphon Red solid
Firmware Update Solid Magenta
Booting up White - blink
Wi-Fi Connected & Alexa not Connected Green blinking
Wi-Fi setup mode Multiple colours

4. Network Setup

4.1 Triggering points

  • Out of the box device has basic “Welcome application”.
  • If the device is loaded with Wi-Fi example application, it can be configured by Pressing and Holding the SW3 button for 4 seconds to enter set up mode.

4.2 Procedure to configure network settings

This section displays the procedures to configure the network in both Android and iOS.

4.2.1. Procedure to configure network using BLE setting through Android App

  • Step 1. Power on the Speaker
  • Step 2. Press and hold SW3 button for 4 seconds LED will turn red colour and then blinks with multiple colours.
  • Step 3. Switch on the Bluetooth connectivity of the phone.
  • Step 4. Launch the MAVID-3M App:
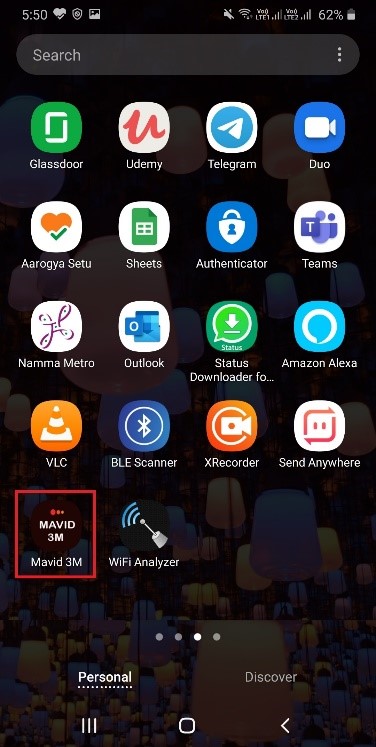
  • Figure 4.2.1-1: MAVID-3M App

  • Step 5. The MAVID-3M App opens with the following screen:
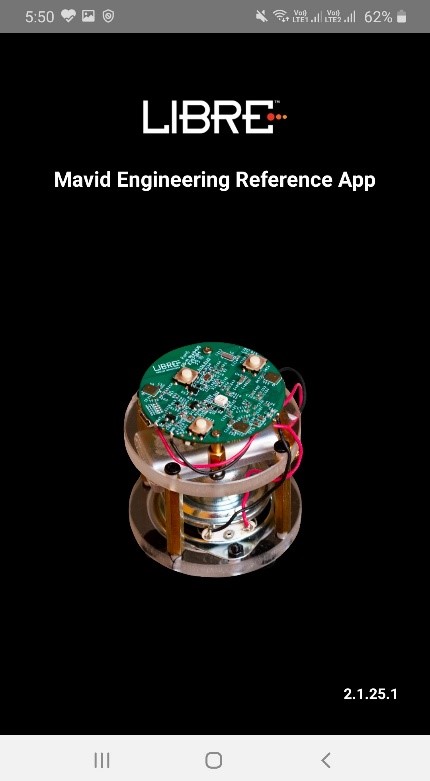
  • Figure 4.2.1-2: Launch Screen

  • Step 6. If there is no MAVID-3M device configured, the home screen appears as below and click Setup New Speaker:
  • Figure 4.2.1-3: Configuration Screen 1

  • Step 7. Click the device to be set up from the list:
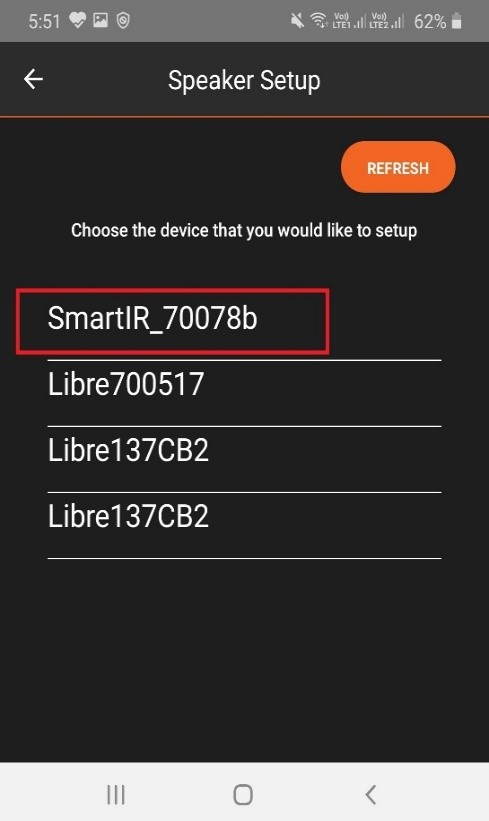
  • Figure 4.2.1-4: Configuration Screen 2

  • Step 8. If you would like to setup speaker to another network, Click No and connect to other network:
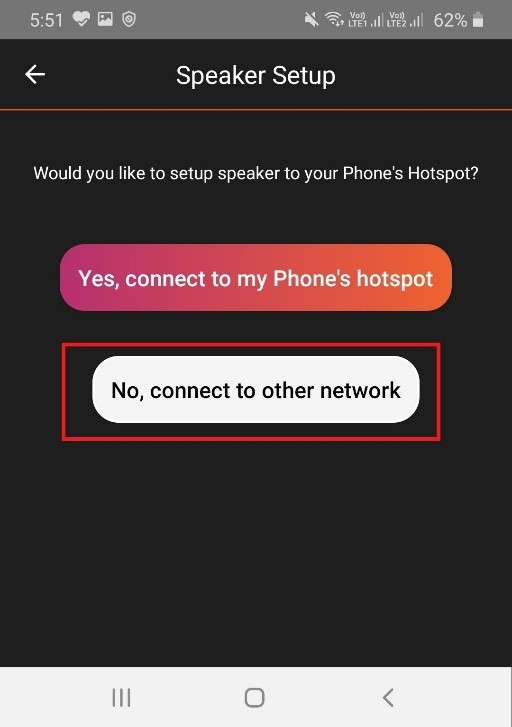
  • Figure 4.2.1-5: Configuration Screen 3

  • Step 9. Select the required Wi-Fi from the drop-down list and enter the password and click Next
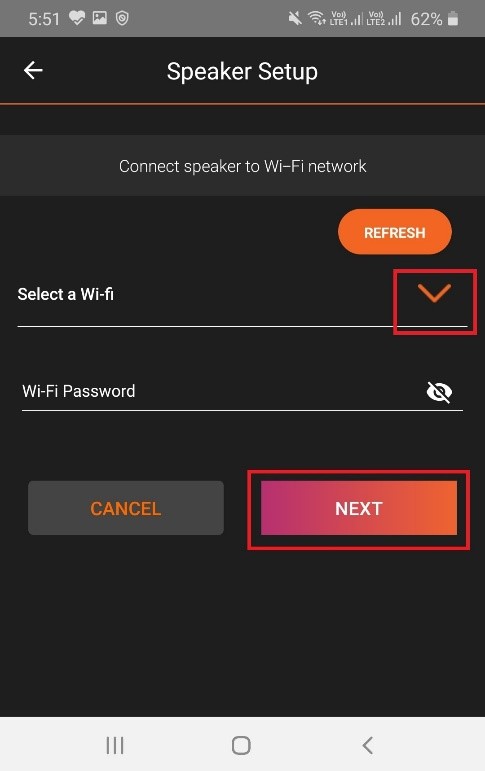
  • Figure 4.2.1-6: Configuration Screen 4

  • Step 10. Click Login with Amazon:
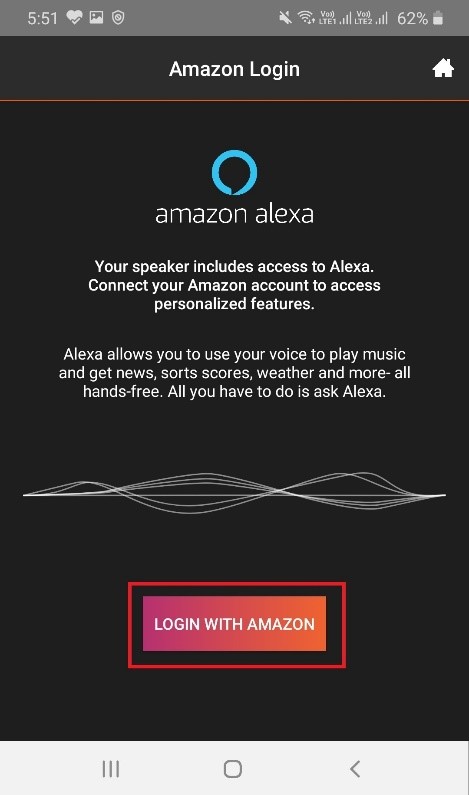
  • Figure 4.2.1-7: Amazon Login Screen 1

  • Step 11. Sign into Amazon with Valid Login Credentials:
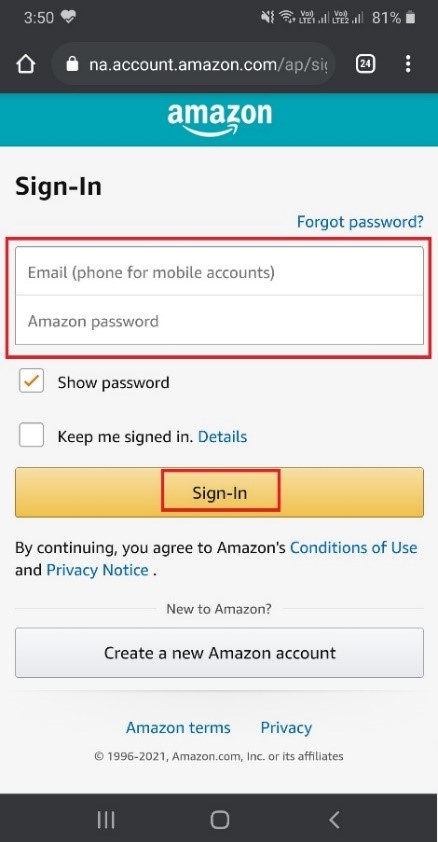
  • Figure 4.2.1-8: Amazon Login Screen 2

  • Step 12. After successful sign in, the below screen appears:
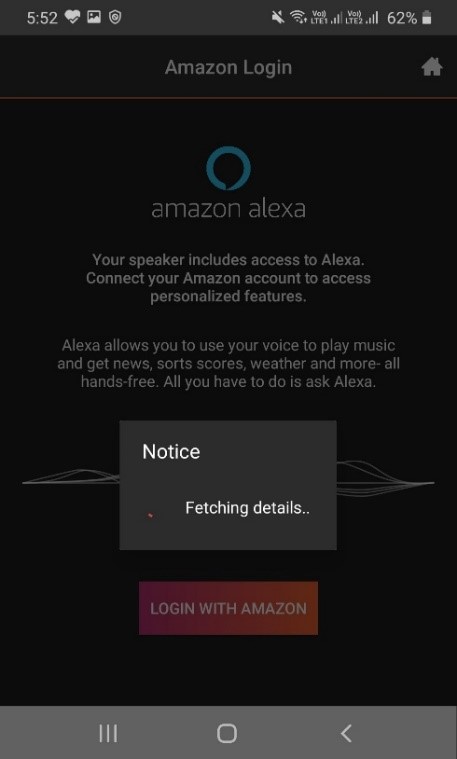
  • Figure 4.2.1-9: Amazon Login Screen 3

  • Step 13. After successful login, the following screen would appear:
  • Figure 4.2.1-10: Amazon Screen

  • Step 14. To sign out from the Amazon Alexa App, click on Sign out.

4.2.2. Procedure to configure network using SoftAP setting through Android App

  • Step 1. Make sure mobile Bluetooth is turned OFF.
  • Step 2. If there is no MAVID-3M device configured, click on Setup New Speaker:
  • Figure 4.2.2-1: Configuration Screen 1

  • Step 3. Click on Other Setup Option:
  • Figure 4.2.2-2: SoftAP Configuration screen 1

  • Step 4. Click on Wi-Fi SETTINGS:
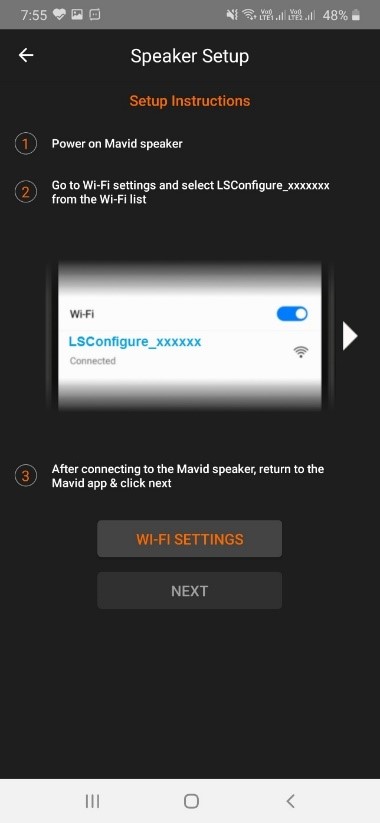
  • Figure 4.2.2-3: SoftAP Configuration screen 2

  • Step 5. Select your Wi-Fi from the list:
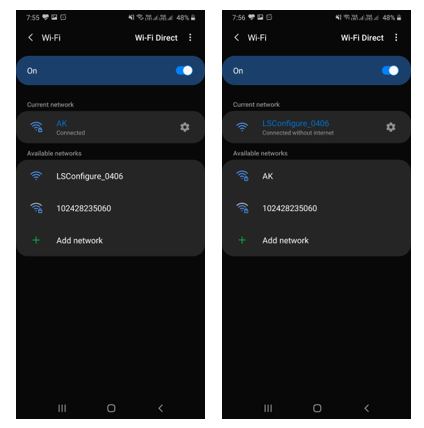
  • Figure 4.2.2-4: SoftAP Configuration screen 3

  • Step 6. Either connect to your phone hotspot or other network:
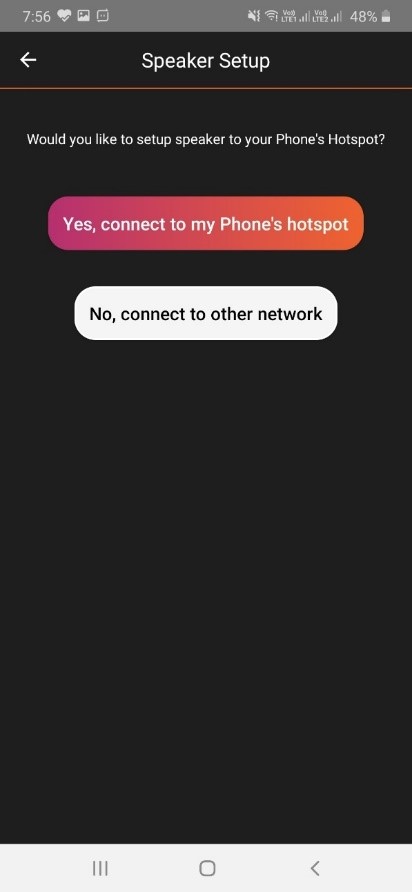
  • Figure 4.2.2-5: SoftAP Configuration screen 4

  • Step 7. Enter the credentials and click Next:
  • Figure 4.2.2-6: SoftAP Configuration screen 5

  • Step 8. Click OK:
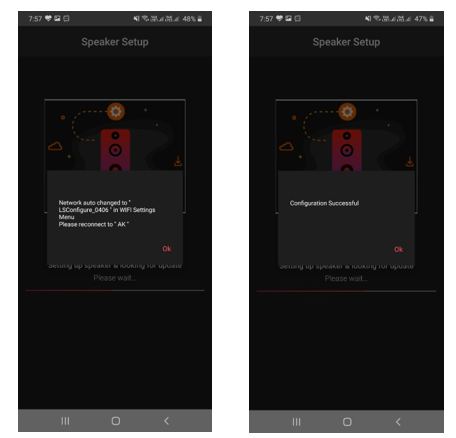
  • Figure 4.2.2-7: SoftAP Configuration screen 6

  • Step 9. Click on Login with Amazon:
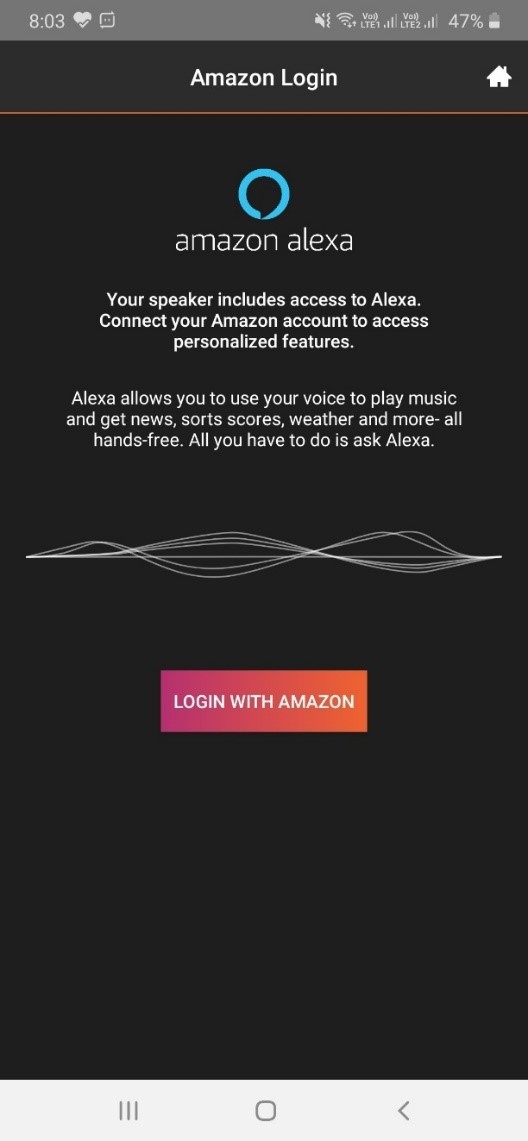
  • Figure 4.2.2-8: Login with Amazon screen

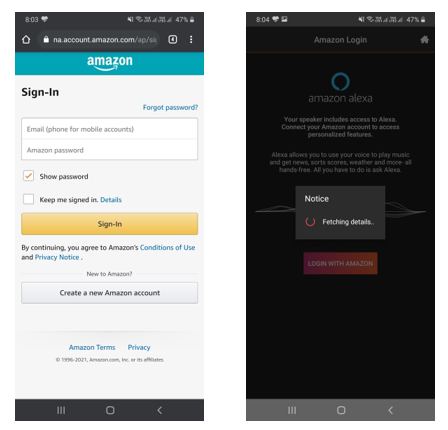
    Figure 4.2.2-9: Amazon Credentials screen

  • Step 10. Enter your Amazon credentials:
  • Step 11. Alexa is successfully configured. Click Change Language if you want to change your language preference:
  • Figure 4.2.2-10: Change Language screen

4.2.3. Procedure to configure network using BLE setting through iOS App

  • Step 1. Power on the Speaker.
  • Step 2. Press and hold SW3 button for 4 seconds LED will turn red colour and then blinks with multiple colours
  • Step 3. Switch on the Bluetooth connectivity of the phone.
  • Step 4. Launch the MAVID-3M App:
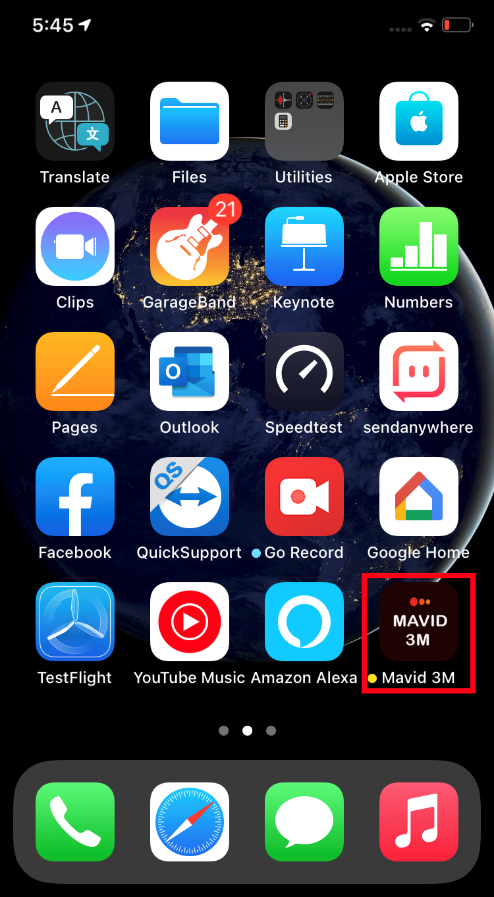
  • Figure 4.2.3-1: MAVID-3M App

  • Step 5. The MAVID-3M App opens with the following screen:
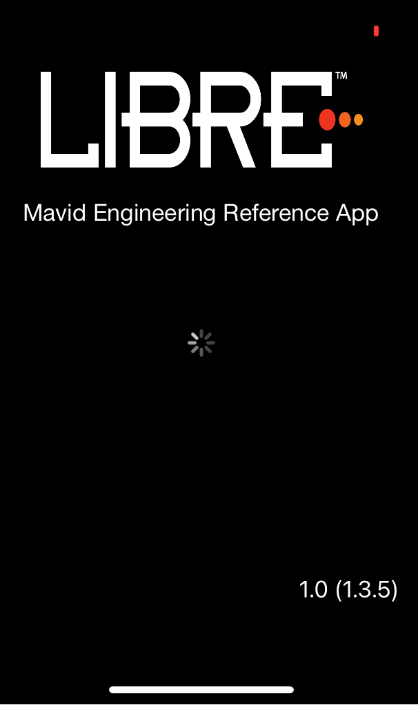
  • Figure 4.2.3-2: Launch Screen

  • Step 6. If there is no MAVID-3M device configured, the home screen appears as below and click Add:
  • Figure 4.2.3-3: Configuration Screen 1

  • Step 7. Click the device that is to be set up from the list:
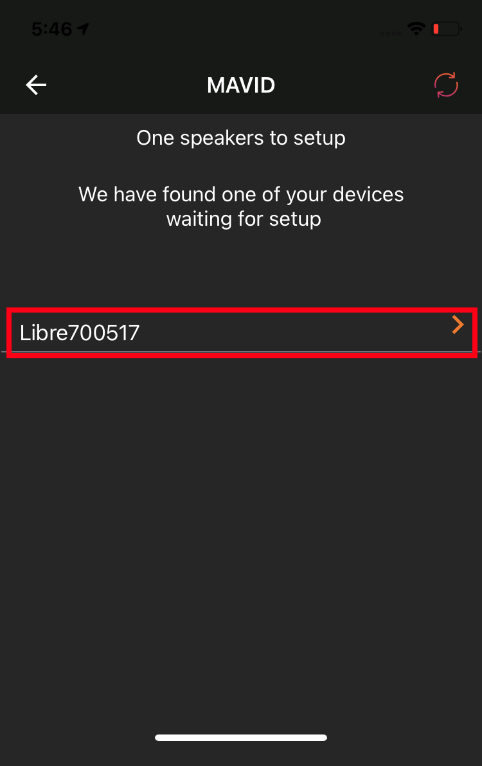
  • Figure 4.2.3-4: Configuration Screen 2

  • Step 8. Select the network type, click Wi-Fi:
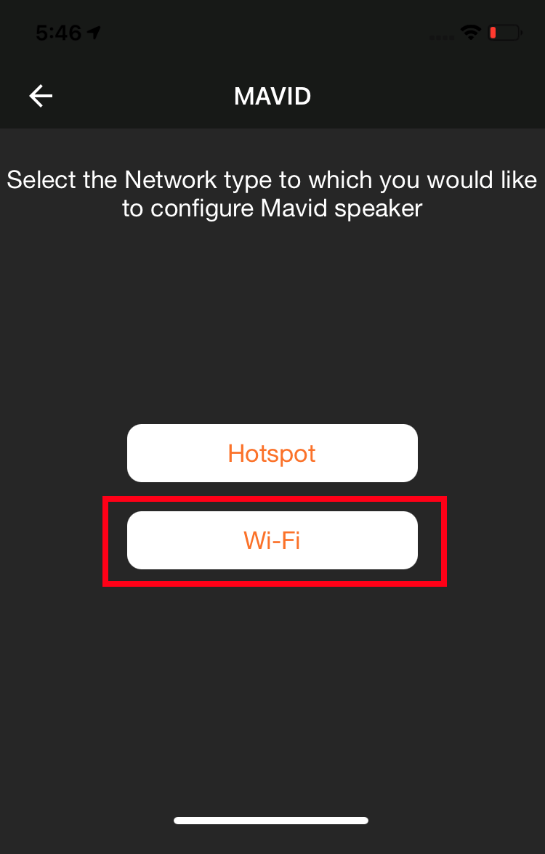
  • Figure 4.2.3-5: Configuration Screen 3

  • Step 9. Select the Wi-Fi from the drop-down list and enter the password and click Next:
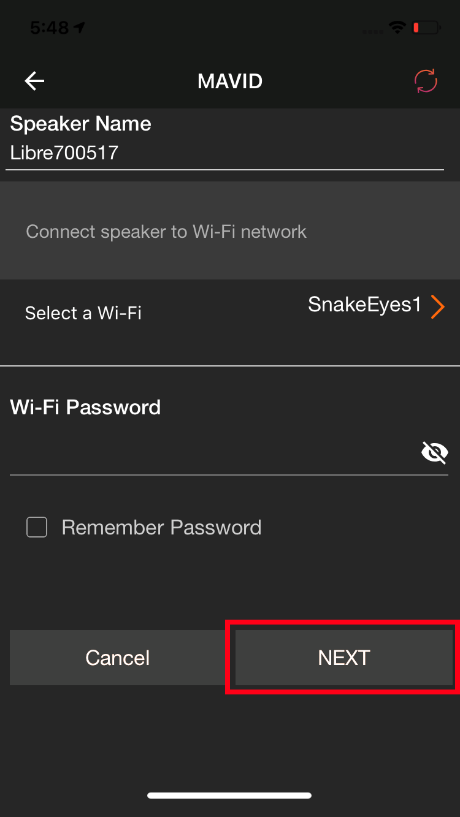
  • Figure 4.2.3-6: Configuration Screen 4

  • Step 10. Speaker setup is in progress:
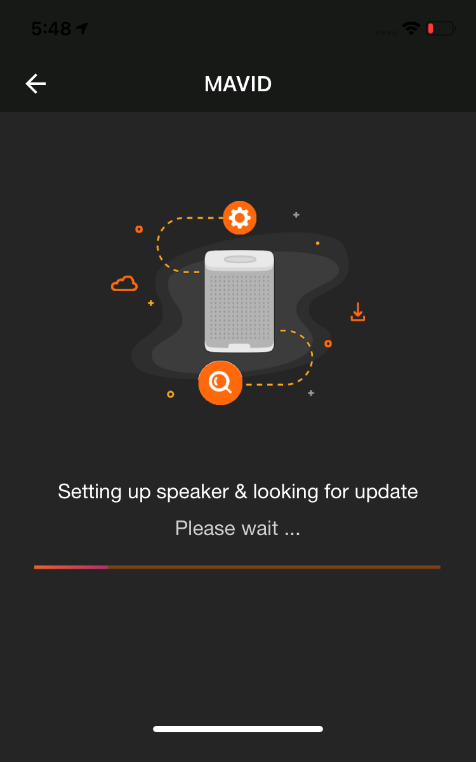
  • Figure 4.2.3-7: Configuration Screen 5

  • Step 11. Click Login with Amazon:
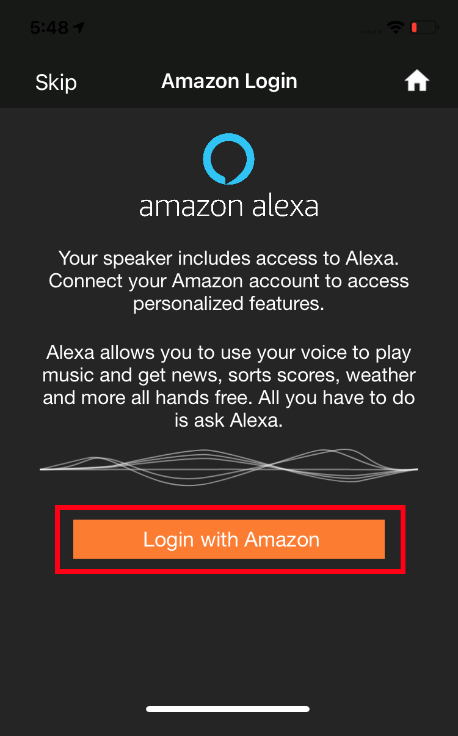
  • Figure 4.2.3-8: Amazon Login Screen 1

  • Step 12. Sign into Amazon with Valid Login Credentials:
  • Figure 4.2.3-9: Amazon Login Screen 2

  • Step 13. Click Allow:
  • Figure 4.2.3-10: Amazon Login Screen 3

  • Step 14. After successful sign in, the below screen appears:
  • Figure 4.2.3-11: Amazon Login Screen 4

  • Step 15. After successful login, the following screen would appear:
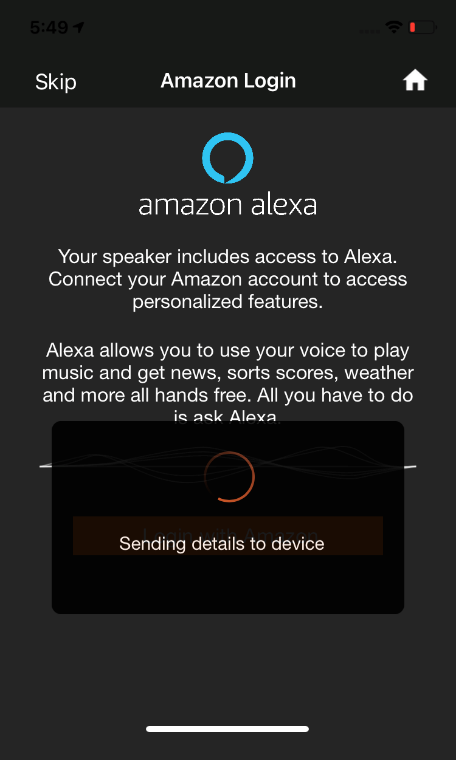
  • Figure 4.2.3-12: Amazon Screen

  • Step 16. To sign out from the Amazon Alexa App, click on Sign out.

4.2.4. Procedure to configure network using SoftAP setting through iOS App

  • Step 1. Make sure mobile Bluetooth is turned OFF.
  • Step 2. If there is no MAVID-3M device configured, click on Setup New Speaker:
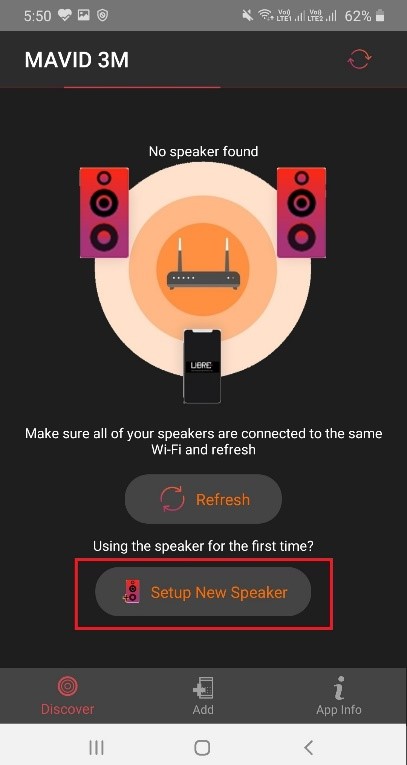
  • Figure 4.2.4-1: Configuration Screen 1

  • Step 3. Click Other Option:
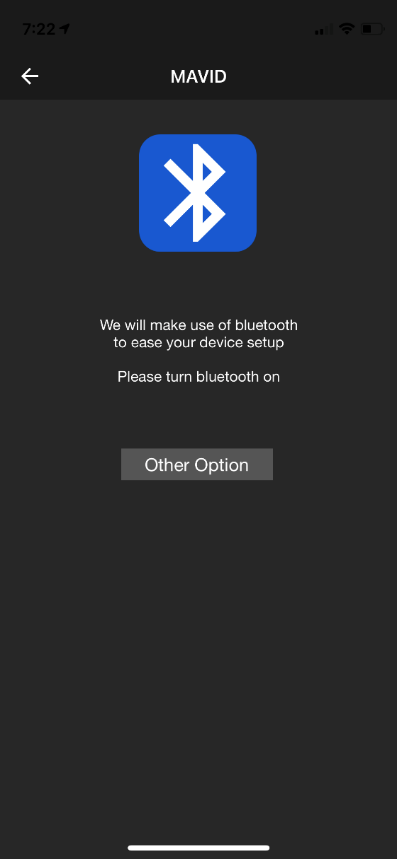
  • Figure 4.2.4-2: SoftAP Configuration screen 1

  • Step 4. Click on WIFI Settings:
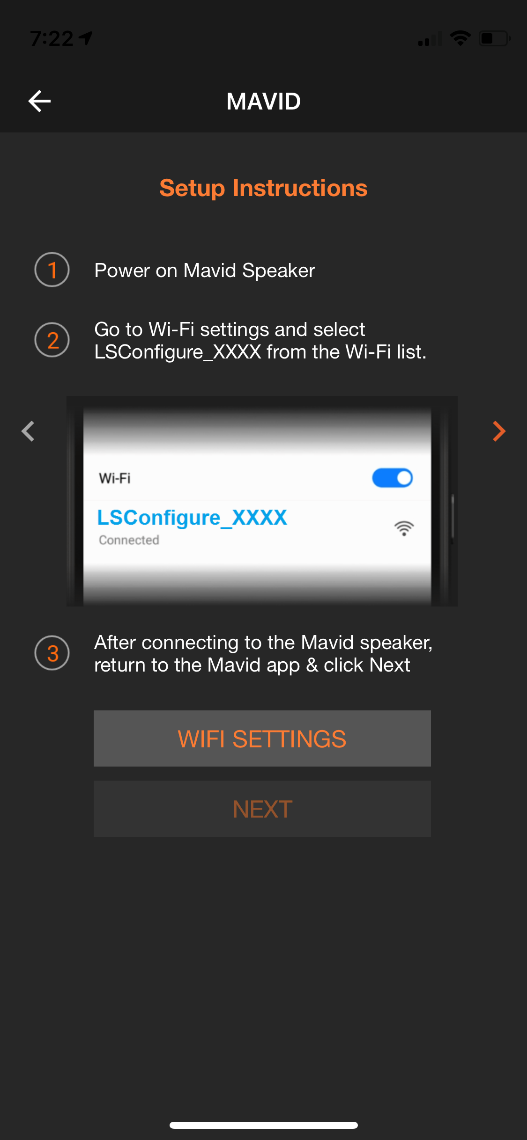
  • Figure 4.2.4-3: SoftAP Configuration screen 2

  • Step 5. Select your Wi-Fi device from the list
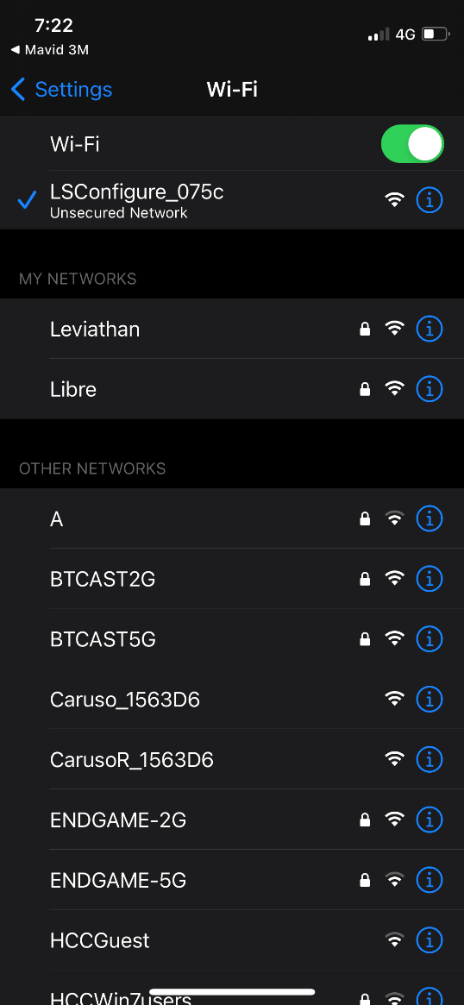
  • Figure 4.2.4-4: SoftAP Configuration screen 3

  • Step 6. Click Next:
  • Figure 4.2.4-5: SoftAP Configuration screen 4

  • Step 7. Click Wi-Fi:
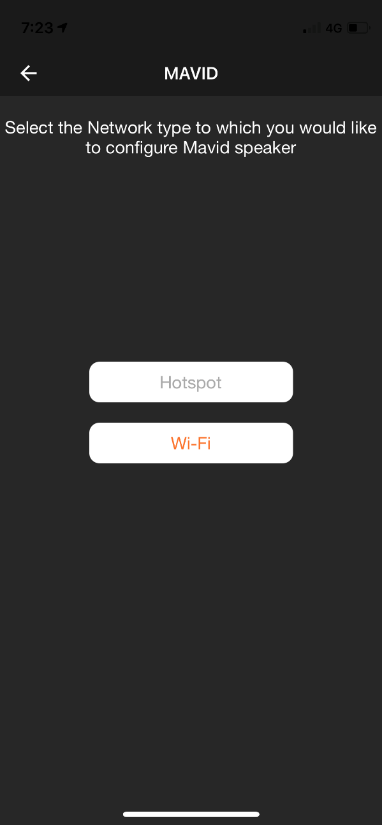
  • Figure 4.2.4-6: SoftAP Configuration screen 5

  • Step 8. Enter the credentials and click Next:
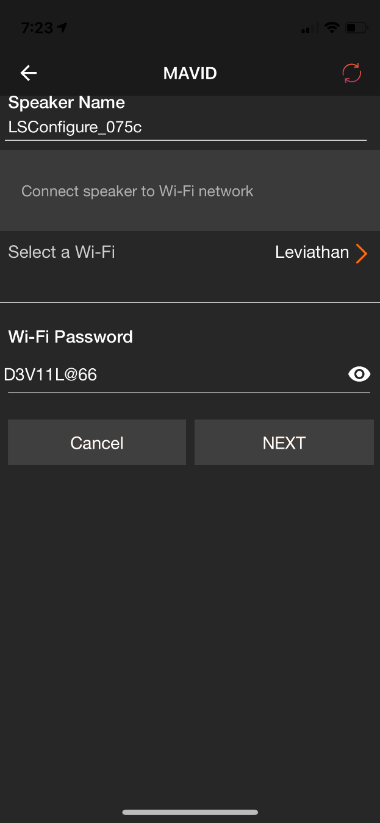
  • Figure 4.2.4-7: SoftAP Configuration screen 6

  • Step 9. The speaker is setup successfully:
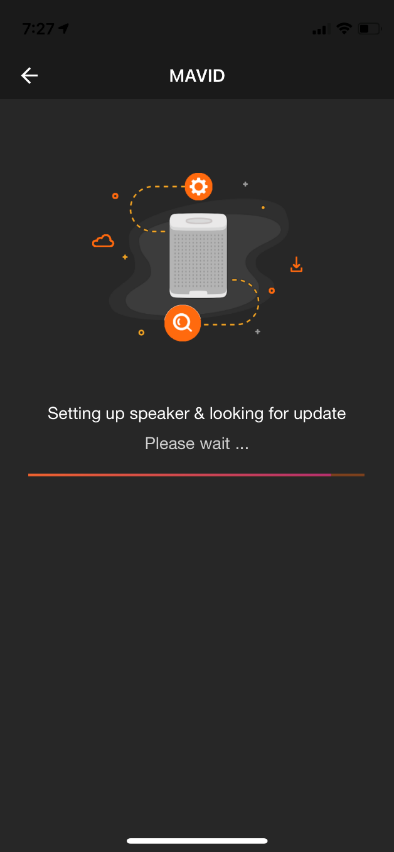
  • Figure 4.2.4-8: SoftAP Configuration screen 7

  • Step 10. Click Login with Amazon:
  • Figure 4.2.4-9: Amazon Login Screen 1

  • Step 11. Sign into Amazon with Valid Login Credentials:
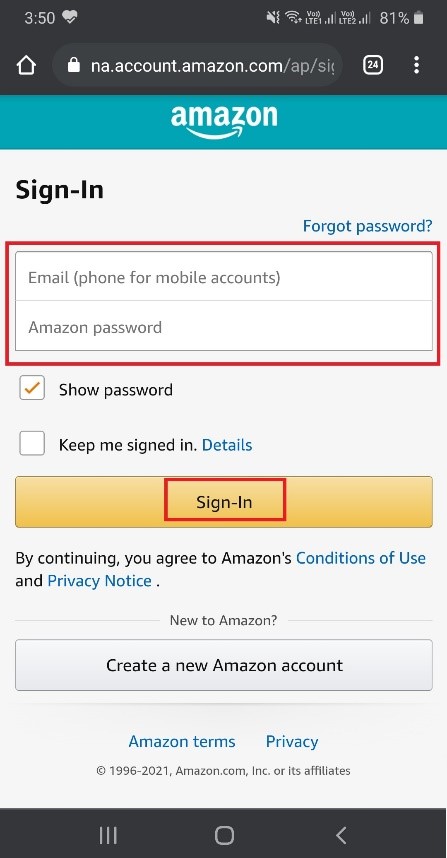
  • Figure 4.2.4-10: Amazon Login Screen 2

  • Step 12. Click Allow:
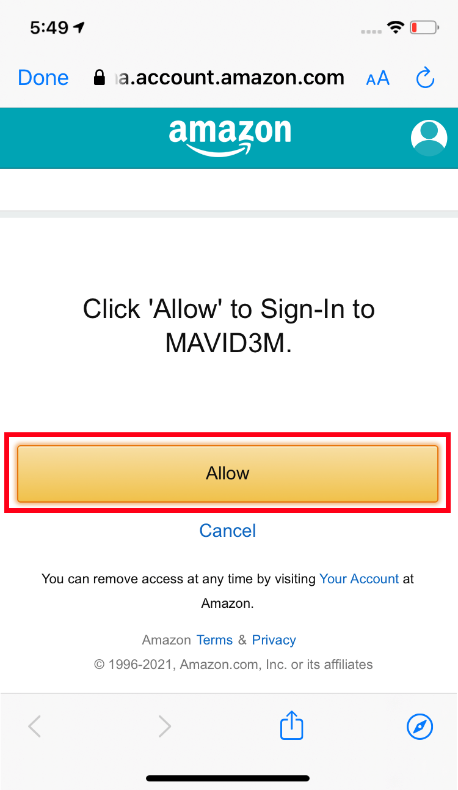
  • Figure 4.2.4-11: Amazon Login Screen 3

  • Step 13. After successful sign in, the below screen appears:
  • Figure 4.2.4-12: Amazon Login Screen 4

  • Step 14. After successful login, the following screen would appear:
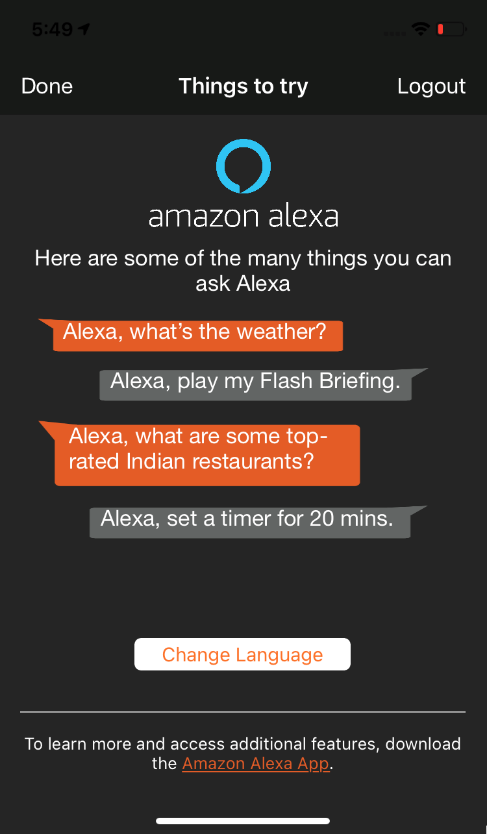
  • Figure 4.2.4-13: Amazon Screen

To sign out from the Amazon Alexa App, click on Sign out.